There’s nothing more frustrating than being out on the road and feeling the unmistakable tilt and wobble of a flat tire or hearing the loud blast of a tire burst. The frustrations intensify once you realize you don’t have a spare tire.
If you have a flat tire and no spare, you can either improvise using a sealant-based tire repair kit, a Fix-A-Flat, a puncture repair kit, or simply call roadside services for professional help.
Maybe you already used your spare, or you haven’t kept the spare in top shape. Perhaps your car is a new model that doesn’t come with a spare. Whatever the case, below are what you can do to get back safely on the road when you have a flat tire without a spare.

1. DIY With a Tire Repair Kit
All types of drivers need basic skills for repairing their cars. Nobody wants to pay hefty repair charges to a mechanic or car shop. One of the simplest repairs most drivers should be able to DIY (Do-It-Yourself) is repairing a flat tire using this AIRMAN tire repair kit.
Newer cars come with a tire repair kit from your car’s manufacturer. When buying your car, check that the tire repair kit is included and in good condition. If not included, ask your dealership whether they can throw one in as part of your negotiation. If not, buy one independently and always keep the kit handy inside your car trunk.
A basic tire repair kit will have a sealant, a valve stem core remover tool, and an air compressor. While different tire repair kits and different types of tires have different repair methods, there are some general steps you can use for almost all tire repair efforts using a sealant.
Examine Tire for Punctures and Check Your Valve System
Check the tire for any puncture, and once you identify the object piercing it, use a pair of pliers to remove the offending item.
Sometimes, however, the cause of a flat tire is a poor valve system rather than a puncture. The valve system is the rubber protrusion you see poking out of your rim. Mix some detergent to water and pour on the valve and around the tire. Where there’s an air leak, the soapy water will blow bubbles.
Use a Sealant
Start by shaking your sealant well like you would shake your cough syrup medicine. Most sealants will come with some small piping for easier injection into the tire. The piping acts as a funnel to reduce spillage. Remove the sealant’s lid and replace it with the piping.
Go to your flat tire and open the valve cap. Use the valve stem core remover to detach the valve from the valve system. The valve stem core remover is a small tool that looks like a screwdriver, except the head has two small prongs.
Once you’ve removed the valve, attach the sealant piping to the valve system, and pour the sealant into the tire. Reattach the valve.
Add Pressure and Drive Around
Use the air compressor to add pressure to your tire to 30 psi. If you don’t have an air compressor, drive to the nearest gas station and pump your tires to the 30 psi (pounds per square inch) or 2.0 bar or 200 kilopascals.
Then, once you’ve added the sealant and pressure, drive around backward and forward to spread the sealant inside the tire. You should drive for at least 10 minutes at approximately 50mph (80km/h).
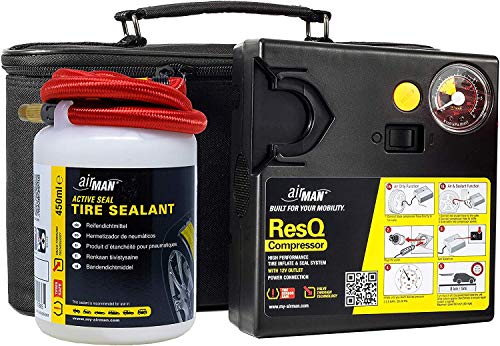
- High performance 12v compressor with...
- Only aftermarket tire repair kit recommended...
- Recommended for Cars, Compact SUV's and...
- 450ml long lasting eco sealant, easily washes...
Pump Your Tire
After 10 minutes, stop and use the air compressor to recheck your tire pressure. If the pressure holds steady, then you have repaired all air leaks. Pump your tire to the manufacturer-recommended pressure.
Repairing your flat tire with a sealant works great if you’re on the road, away from home, and you have no spare. The sealant works fast, requires no special skills, and can get you up and running in no time.
A little word of caution. This method is only a temporary solution to keep you moving for a few days or miles. The sealant allows you to drive to a safe place and get proper service or a replacement. Get your tire checked by a professional or replace it with a new tire as soon as possible. Don’t drive with the sealant for more than 120 miles (200km).
2. DIY With a Puncture Repair Kit
Using something like this Tooluxe puncture repair kit is a little more advanced than using a sealant-based tire repair kit. If you’re not handy with tools and lack experience in tire repair, we wouldn’t advise attempting a puncture repair. However, if you’re on the road somewhere and have a flat with no spare, a puncture kit could be your solution.
Just like the sealant, a puncture repair kit should be part of your car toolbox in your trunk at all times. A puncture kit contains:
- A rasp tool (reamer tool) – This is a T-shaped tool with a rough tip.
- Strip insertion tool – This is another T-shaped tool that looks like a big sewing needle
- Rubber cement
- A car jack (hydraulic jack)
- Socket wrench (also known as a lug wrench or wheel brace)
- Puncture plug – These are sticky rubber strips that look like strips of beef jerky
- Rubber cement
Once you notice a flat tire, take the following steps:
Park Safely
Park your car on a flat surface not too close to moving traffic. You don’t want a passing car to hit you as you move around working on the punctured tire, so choose somewhere safe as much as possible. Don’t park on an incline or decline as the car may roll away or fall on the wheel rims.
Loosen Nuts and Jack the Car
Once you’ve parked safely, start by loosening all the nuts of the tire. Then, you should find a proper lift point underneath your car. Again, double-check that your car is on a flat surface. Using your jack, lift the side with the flat tire up.
Remove Wheel, Find Puncture, and Clean the Area
Finish removing the loose nuts and remove the tire. Next, using the soapy water method, find the source of the tire’s air leak. Remove any nails or objects piercing the tire. Then, use the rasp tool (or reamer tool) to punch in and out and enlarge the puncture hole.
Seal the Puncture Hole
Take out one of the sticky rubber strips. Thread the strip through the eye of the strip insertion tool. Apply rubber cement to the strip. The rubber cement lubricates the plug kit and also makes for a stronger air seal.
Using the insertion tool, push the strip into the tire through the puncture hole. Don’t push the whole strip into the hole. Instead, leave about 3/4 inches (2cm) sticking out. With a quick and sudden pull, remove the insertion tool. It should come out clean without the sticky strip. Cutaway the extra strip hanging out of the tire. Your puncture is now sealed. Re-inflate your tire, reattach the tire to the car, drop your jack, and you’re good to go.
For DIY enthusiasts, the puncture repair process is quite easy and quick. It takes only a few minutes, and most times, you don’t have to later do a tire replacement. A puncture repair offers a stronger seal than using a sealant.
Remember to once again use the soapy water to check whether your seal still has an air leak. Also, a puncture repair can’t be used on a sidewall puncture.

- VERSATILE TIRE REPAIR KIT: This flat tire...
- DURABLE TIRE KIT: Our fix a flat tire repair...
- DESIGN: The T-handle puncture repair tool has...
- QUICK REPAIR KIT: This patch and tire plug...
3. Buy a Used Spare
If you’re stranded because of a flat tire, you can quickly search online and buy a used tire locally. With your smartphone, you can search for local salvage yards near you. You may also use websites and apps such as eBay and Craigslist to connect with people seeking to sell off their used or spare tires.
However, be careful not to buy tires that are cracked or otherwise in poor condition. Even though you’re in an emergency and need something to get you through a short distance, you don’t want to endanger your life and car by buying a tire that doesn’t match your car.
When buying from online sellers, check whether they can deliver to your current location. Some sellers will insist that you collect or wait for delivery by mail.
See also: How Often Should You Change Your Tires?
4. Use Fix-a-Flat
If you notice that one of your tires is leaking air, you can use special emergency sealants such as Fix-A-Flat. For best results, only use Fix-A-Flat when your tire hasn’t gone completely flat, and follow the steps below:
- Stop the car in a safe area with level ground.
- Find the puncture and mark its position.
- Slowly move the car until the puncture is downwards, at a six o’clock position.
- Shake your can of Fix-A-Flat vigorously for about 30 seconds.
- Remove the lid on the valve system and attach the Fix-A-Flat can. The can comes with a pipe that you can screw into the tire’s valve system.
- Hold the can upright and firmly press the spray button on top. Keep injecting the fluid into the tire until the rim lifts off the ground. The fluid activates immediately when you see it has stopped moving through the clear pipe.
- Unscrew the pipe’s nozzle and detach from the valve.
- Drive for ten minutes to allow the sealant to spread evenly inside the tire.
- Find the nearest pump station and inflate your tire to the manufacturer’s recommended pressure.
Fix-A-Flat is a temporary solution to avoid getting stranded. Ensure a professional checks your tire within three days or 120 miles (200Km), whichever comes first.
Using Fix-A-Flat is as easy as inflating your tire. You don’t need any special tools or skills to handle a flat tire. It’s a plug and play solution which almost any type of driver can manage on their own.
However, some tire manufacturers warn that using Fix-A-Flat renders your tire irreparable, so you will have to replace the tire within three days or after about 120km.
Also, some insurance covers may be voided if you use Fix-A-Flat. This is especially true if you continue using a tire beyond a certain amount of time or mileage after repairing with Fix-A-Flat. Check with your insurance provider for policy and coverage details and exceptions.
You need to get one that says it’s tire sensor safe. Otherwise, the other types can ruin your tire sensors. Also, only use Fix-A-Flat on tires that are in generally good working condition. Do not use bald tires or tires with punctures in the sidewall.
Get the can labeled ‘Non-Flammable Formula.’ Avoid the older type with flammable fluid as they may pose a fire hazard to your car or mechanics working on your car.

- Seals and inflates in seconds
- Hose top works on all wheels
- TPMS safe
- Easy and safe to use - non-flammable formula
5. Call Roadside Assistance
If you’re not good with tools or prefer to have professionals handle your repair work, then you may need to call a reliable roadside assistance service. Buying an emergency rescue subscription is often more affordable and less risky than simply calling when you’re already in an emergency. Some of the most common roadside emergency assistance services to call when you have a flat tire include:
- Triple-A (AAA)
- Your insurance company/agent
- Your local car repair shop
- Nationwide
- Allstate Motor Club
- GEICO
Apart from flat tires, some more services you can receive from emergency roadside service providers include:
- Car towing
- Battery replacement
- Vehicle lockout services
- Fuel delivery
- Extrication services (if your car is stuck in difficult-to-drive terrain)
- Complimentary car rental and rental discounts
6. Invest in Zero-Pressure Tires
Let’s face it. Most flat tires happen when you’re not prepared or even dressed for a DIY roadside job. Calling for roadside assistance may be a better option, but you have to find a safe parking spot away from traffic and creepy lurkers. Then you have to wait for 30 minutes to more than an hour before the roadside assistance arrives.
You could invest in zero-pressure tires with some forethought, also known as run-flat tires or self-supporting tires. Run-flats can support the weight of a vehicle for some considerable distance, sometimes more than 100 miles.
You don’t have to park your car on a busy highway or get out of the car in the cold/heat to work on repairs. Instead of being stranded in a sketchy part of town, you can keep driving for another 50 or 80 or 100 miles to the next town if need be.
To stay on course and avoid accidents, drivers with a flat zero-pressure tire have to reduce their speed to about 50mph (80km/h).
One of the top advantages of using zero-pressure tires is they offer better stability after a tire blowout. If your tire blows, the zero-pressure tire will experience better tread stabilization and less weight transfer. The drivers handling and steering will likely not be adversely affected.
Even though zero-pressure tires offer a host of advantages, drivers should avoid driving beyond the range and speed limitations. Driving for longer distances or higher speeds may increase tire disintegration.
Also, because run-flat tires don’t bulge when low, you have to be keen and check your tire pressure monitoring system regularly. The run-flats are also more expensive and often have to be replaced sooner than regular tires.
In Conclusion
If you need to fix a flat tire without a spare, you need to plan. Anticipate future incidents by equipping your toolbox with the right tools.
Sealant-based tire repair kits are fast and easy to use and don’t need any special skills. Fix-A-Flat may be the ultimate quick fix for tire punctures and needs no special tools or DIY skills. A puncture repair kit may require slightly higher knowledge and experience working with tools but offers a stronger puncture repair. Roadside services can provide professional services with a call where they are available.
RELATED POSTS:
By